
Crawlspace mold is treated through three steps: physical removal of mold-infested materials, correction of the moisture source driving growth, and verification that the environment stays dry long-term. Skip any one of those steps and the mold comes back. An exposed dirt floor alone can release 10–15 gallons of water vapor per 1,000 sq ft every day, which means the space is almost always fighting against you. The good news is that a complete treatment plan, covering mechanical removal, EPA-registered antimicrobials, vapor barriers, and dehumidification, gives you a real path to a mold-free crawlspace.
How crawlspace mold is treated: physical removal methods
Effective mold remediation in a crawlspace starts with getting the mold off the surface before anything else happens. Spraying a product over active growth and walking away is not remediation. It is a temporary cover-up.
The standard physical removal process uses three techniques in combination:
- Wire brushing and scraping removes surface colonies from wood joists and beams. This is the first pass, and it exposes the substrate for deeper treatment.
- HEPA vacuuming captures loose spores before they go airborne. Standard household vacuums are not built for this. Professional HEPA vacuums capture 99.97% of particles down to 0.3 microns, which is the size range where mold spores live.
- Media blasting (dry ice or soda blasting) is used on heavily infested structural wood. It strips mold from the grain without saturating the wood with water, which would make the moisture problem worse.
After mechanical removal, the wood gets treated with an EPA-registered antimicrobial product. This matters because bleach and standard cleaners only work on the surface. Mold hyphae grow into wood grain, and surface cleaners fail to reach them. Without a penetrating antimicrobial, mold typically regrows within 1–3 months.
Air scrubbing runs throughout the entire process. HEPA air scrubbers pull airborne spores out of the crawlspace continuously, preventing them from settling on clean surfaces or migrating into the living area above. This step is not optional. Combined HEPA vacuuming and air scrubbing is the professional standard for managing spore loads during cleanup.
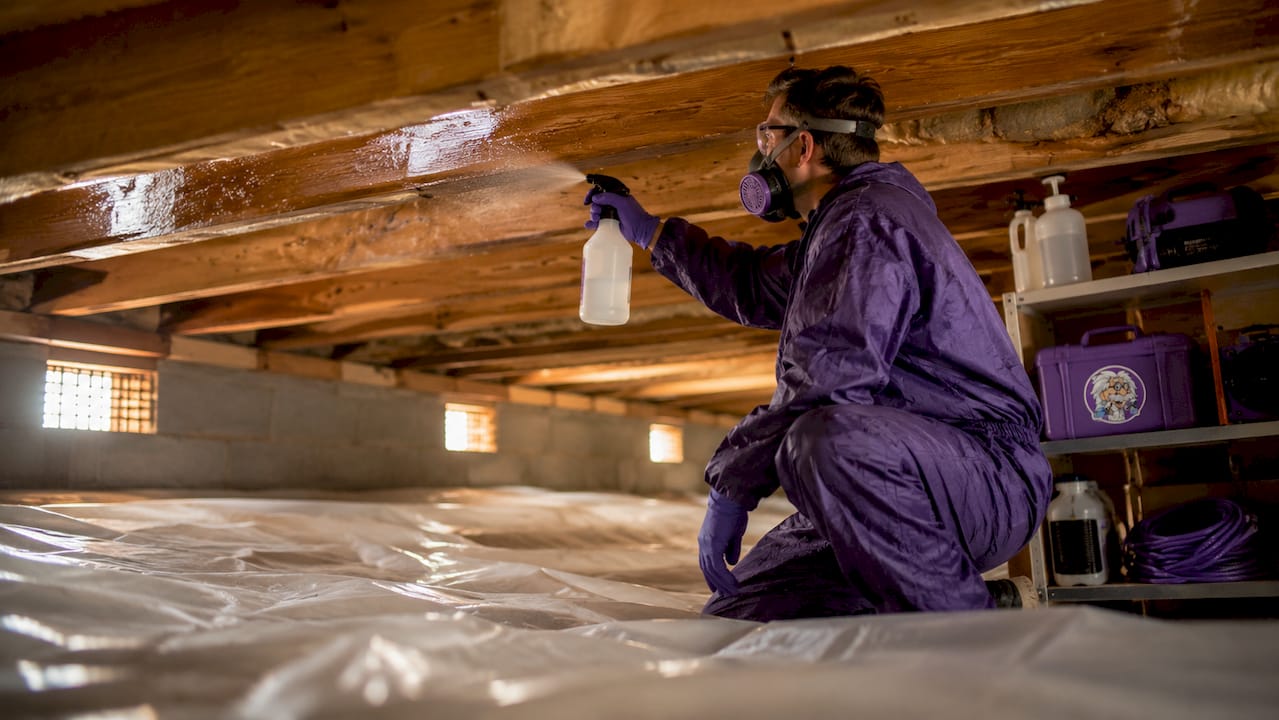
Pro Tip: Never seal or encapsulate a crawlspace before completing full mold removal. Mold trapped under a vapor barrier goes dormant but does not die. When moisture finds its way back in, and it always does eventually, the colony reactivates.
How do moisture control and environment management prevent mold recurrence?
Mold is a symptom of a moisture problem, not the root cause. Treat the mold without fixing the water source and you are on a cycle that never ends.
The most common moisture sources in crawlspaces are:
- Ground vapor rising from bare soil. This is the single biggest contributor in most homes.
- Poor exterior drainage, including improper yard grading, clogged gutters, and downspouts that discharge too close to the foundation.
- Foundation vents that let warm, humid outdoor air into a cooler space. Research shows that homes with more foundation vents have higher wood moisture content during summer. The industry has largely shifted away from vented crawlspaces for this reason.
- Plumbing leaks from supply lines or drain pipes running through the crawlspace.
Fixing bulk water intrusion comes first. Regrade soil away from the foundation, clean gutters, and extend downspouts at least six feet from the house. No vapor barrier or dehumidifier compensates for water actively flowing into the space.
Once bulk water is addressed, the next step is installing a heavy-duty vapor barrier. The standard is 12–20 mil polyethylene sheeting with sealed seams and edges attached to the foundation walls. Older 6-mil barriers frequently fail from tears and shifting, allowing soil vapor to pass through. Thicker barriers hold up against foot traffic and pest activity.
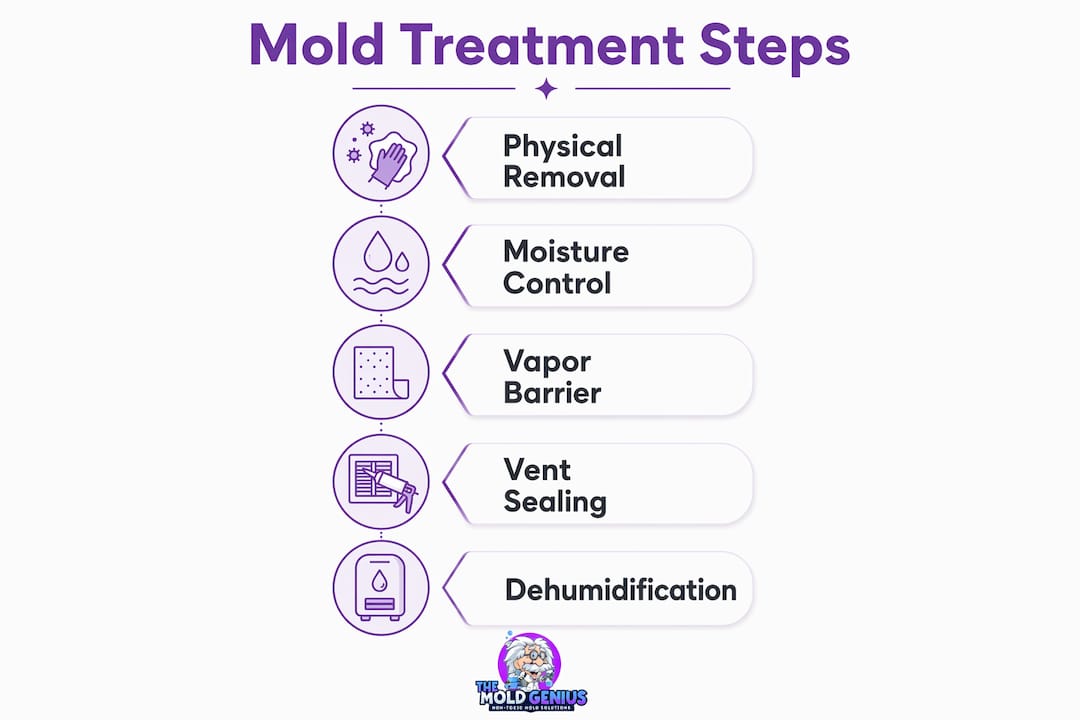
Sealing foundation vents is the step that surprises most homeowners. Open vents introduce external humidity that condenses on cooler interior surfaces, raising the mold risk significantly. In most climates, a sealed and conditioned crawlspace outperforms a vented one.
Finally, a commercial-grade crawlspace dehumidifier maintains relative humidity at 45–55%. Units rated for crawlspace use cost $800–$1,800 and run continuously to hold that target range. Residential dehumidifiers are not built for the load or the environment.
Pro Tip: Inspect your vapor barrier and dehumidifier at least once a year. Pest activity and foot traffic create tears that go unnoticed for months. A small breach in the barrier can undo an entire remediation.
Bleach vs. vinegar vs. professional treatments: which actually works?
Homeowners reach for bleach first. It is understandable. Bleach is cheap, available, and it visibly removes the dark staining. The problem is that visible staining and active mold are not the same thing.
| Treatment | Efficacy on wood | Safety in enclosed spaces | Penetrates wood grain | Best use case |
|---|---|---|---|---|
| Bleach | Low | Poor (hazardous fumes) | No | Hard, non-porous surfaces only |
| Hydrogen peroxide | Moderate | Better than bleach | Partial | Light surface mold on non-porous materials |
| Vinegar (white distilled) | Moderate to good | Acceptable | Partial | Safer household alternative, limited depth |
| EPA-registered antimicrobial | High | Formulated for enclosed use | Yes | Structural wood, professional remediation |
Bleach kills mold on hard, non-porous surfaces like tile or concrete but fails on structural wood. The water in bleach actually absorbs into the wood and raises its moisture content, which feeds future growth. The fumes are also a real hazard in a confined crawlspace with no ventilation.
Hydrogen peroxide works faster than vinegar on spores but is less effective than vinegar on wood-embedded mold. Neither reaches the depth that professional antimicrobials do. Vinegar is the safer household option if you are dealing with a very small, isolated area and have already fixed the moisture source. For anything covering more than a few square feet of structural wood, household products are not enough.
Professional EPA-registered antimicrobials are formulated to penetrate wood grain and kill hyphae at the root. They are also designed for use in enclosed spaces, which matters when you are working in a crawlspace with limited airflow. Pairing these treatments with antimicrobial fogging reaches areas that brush or spray application cannot access.
Pro Tip: Never encapsulate a crawlspace after spraying a household product and calling it done. Mold sealed inside without full physical removal goes dormant and reactivates the moment humidity rises again.
How to verify successful mold remediation and keep it that way
Finishing the physical work is not the finish line. Verification confirms the treatment worked, and ongoing maintenance keeps it working.
Post-remediation verification covers:
- Visual inspection of all treated surfaces. No visible growth, no staining that was not there before treatment, and no musty odor.
- Moisture readings on wood joists and beams using a pin-type moisture meter. Wood moisture content should be below 19% to be outside the mold growth range.
- Air quality testing using spore trap samples taken inside the crawlspace and compared to outdoor baseline counts. A certified industrial hygienist interprets the results.
- Humidity monitoring with a digital hygrometer left in the space for at least 48 hours after treatment to confirm the dehumidifier is holding the target range.
The most common reasons mold returns after treatment are not mysterious. Degraded vapor barriers and dehumidifier breakdowns are the two leading failure points. Vapor barriers take damage from pest activity, foot traffic during inspections, and simple age. Dehumidifiers in crawlspaces work in a demanding environment and need servicing or replacement every 5–8 years.
Watch for these early warning signs between inspections: a musty smell coming through floor vents, increased allergy symptoms in the home, or visible condensation on pipes in the crawlspace. Any of these signals that humidity has climbed back into the danger zone. Catching it early costs far less than a second full remediation. Encapsulation upgrades cost $3,000–$15,000, but they prevent the kind of structural damage that runs far higher.
For a full breakdown of what professional verification looks like, the mold remediation verification guide at Themoldgenius walks through each inspection step in detail.
Key Takeaways
Effective crawlspace mold treatment requires physical removal, moisture correction, and verified environmental control to prevent recurrence.
| Point | Details |
|---|---|
| Physical removal comes first | Wire brushing, HEPA vacuuming, and EPA-registered antimicrobials must precede any encapsulation. |
| Bleach does not work on wood | Bleach fails to penetrate wood grain and raises moisture content, feeding future mold growth. |
| Vapor barriers need to be thick | Use 12–20 mil polyethylene sheeting with sealed seams; 6-mil barriers tear and fail over time. |
| Seal vents, do not open them | Foundation vents introduce humid air that condenses inside, increasing mold risk in most climates. |
| Maintenance prevents recurrence | Inspect vapor barriers and service dehumidifiers every 5–8 years to catch failure points early. |
What I have learned after years of crawlspace mold jobs
The mistake I see most often is homeowners who encapsulate first and ask questions later. They find mold, get a quote for encapsulation, and think the barrier will solve everything. It does not. Sealing a crawlspace with active mold inside is like putting a lid on a problem. The mold goes dormant, the homeowner thinks it is gone, and six months later the smell is back and the wood is worse than before.
The second most common mistake is believing that drying the space out kills the mold. It does not. Mold in a dry environment is dormant mold. It is still alive, still attached to the wood, and waiting for conditions to change. Physical removal is not optional. It is the whole point.
I also want to push back on the idea that crawlspace work is a good DIY project. The combination of confined space, airborne spores, and the need for HEPA equipment makes it genuinely hazardous without the right gear. A homeowner with a bottle of vinegar and a dust mask is not equipped for a joist covered in Cladosporium or Penicillium. The exposure risk is real, and the incomplete treatment just delays the problem.
What actually works long-term is the full sequence: remove the mold properly, fix the water source, install a quality vapor barrier, seal the vents, run a commercial dehumidifier, and check the space once a year. That is not complicated. It is just thorough. And thorough is the only thing that actually sticks.
For homeowners who want to understand how professional remediation prevents future mold, the process is more straightforward than most people expect.
— Jim
Get professional crawlspace mold removal done right
If you have found mold in your crawlspace, the worst move is waiting. Mold on structural wood spreads, and the longer the moisture problem continues, the more material needs to be replaced.

Themoldgenius serves the Chicagoland area with a three-phase process: thermal imaging and moisture detection to find what you cannot see, physical removal using hospital-grade treatment, and prevention work to fix the root cause. Their crawlspace mold removal service covers everything from mechanical removal to vapor barrier installation and dehumidification. Most jobs wrap up in a single day. Free estimates are available, and they work directly with major insurers including Allstate, State Farm, and USAA. Call Themoldgenius before the problem gets into your floor joists.
FAQ
What is the first step in treating crawlspace mold?
Physical removal is always the first step. Wire brushing, HEPA vacuuming, and EPA-registered antimicrobial treatment must happen before any vapor barrier or encapsulation work begins.
Does bleach kill mold in a crawlspace?
Bleach kills mold on hard, non-porous surfaces but is ineffective on structural wood. It does not penetrate wood grain, raises moisture content, and produces hazardous fumes in enclosed spaces.
What humidity level prevents crawlspace mold?
Maintaining relative humidity between 45% and 55% prevents mold growth. A commercial-grade crawlspace dehumidifier is required to hold that range consistently.
Should crawlspace vents be open or sealed?
In most climates, foundation vents should be sealed. Open vents allow warm, humid outdoor air to enter and condense on cooler surfaces inside, which increases mold risk.
How long does crawlspace mold remediation last?
A properly completed remediation with a quality vapor barrier and maintained dehumidifier can last many years. Vapor barriers and dehumidifiers typically need servicing or replacement every 5–8 years to stay effective.