
Bathroom mold is one of those problems that seems manageable until it isn’t. You wipe it down, it comes back. You scrub harder, it spreads. Proper bathroom mold removal step by step isn’t just about elbow grease. It’s about using the right products in the right order, on the right surfaces, with the right protection. This guide walks you through exactly that, from suiting up safely to scrubbing grout lines to making sure the mold doesn’t return in two weeks. Whether you’re dealing with a few black spots on caulk or a grout line that’s been gray for months, you’ll find a clear path forward here.
Table of Contents
- Key takeaways
- Bathroom mold removal step by step: what to do before you start
- The step-by-step mold removal process
- Troubleshooting persistent mold and hidden problems
- Preventing bathroom mold from coming back
- My honest take after years of seeing this done wrong
- When DIY isn’t enough: professional mold removal
- FAQ
Key takeaways
| Point | Details |
|---|---|
| Prep before you clean | Gather PPE, ventilate the space, and pre-clean soap scum before applying any mold treatment. |
| Dwell time is non-negotiable | Let cleaning solutions sit 20 to 30 minutes to kill mold at the root, not just the surface. |
| Surface type changes everything | Porous materials like grout and caulk need different treatment than glazed tile, and sometimes need replacement. |
| Treat beyond the visible patch | Mold extends 6 to 12 inches past what you can see, so always clean a wider zone. |
| Prevention beats repeated removal | Humidity control, fan use, and grout sealing every one to two years stop mold before it starts. |
Bathroom mold removal step by step: what to do before you start
Getting the prep right is what separates a cleaning session that actually works from one that just moves spores around. Before you touch a single moldy surface, you need the right gear, the right setup, and a clear picture of what you’re dealing with.
Safety gear you need
Wearing PPE during mold removal is not optional. Disturbing mold releases spores into the air, and breathing them in or getting them on your skin causes real health problems. At minimum, you need:
- An N95 respirator (not just a dust mask)
- Nitrile gloves, not thin latex
- Safety goggles or glasses with side protection
- Old clothes you can wash immediately afterward, or a disposable coverall
Open a window or run the exhaust fan before you start. Ventilation keeps airborne spores moving out of your breathing zone rather than settling back onto surfaces.
Tools and supplies to gather
You don’t need a cart full of products. You need the right ones. Here’s what to have ready before you begin:
- White vinegar (undiluted)
- 3% hydrogen peroxide
- Baking soda
- A stiff-bristled grout brush and an old toothbrush
- Spray bottles (at least two, clearly labeled)
- Microfiber cloths and paper towels
- A bucket with warm water for rinsing
- Dish soap for pre-cleaning
Inspect the area and pre-clean first
Before any mold treatment goes on, look at the full scope of what you’re dealing with. If the affected area is larger than 10 square feet, the EPA recommends calling a professional rather than attempting DIY removal. That’s roughly a 3×3 foot patch. Anything smaller is generally safe to handle yourself.
Once you’ve assessed the area, pre-clean with dish soap and warm water. This step gets skipped constantly, and it’s a mistake. Soap scum acts as a biofilm that shields mold from cleaning agents. Scrub the surface with dish soap first, rinse it clean, and then apply your mold treatment. You’re essentially removing the mold’s armor before you attack it.
Pro Tip: Label your spray bottles clearly. Vinegar and hydrogen peroxide should never be mixed together. They react and create peracetic acid, which is corrosive and irritating to airways.
| Surface type | Recommended cleaner | Notes |
|---|---|---|
| Glazed ceramic tile | Vinegar or hydrogen peroxide | Easy to clean; non-porous |
| Grout lines | Hydrogen peroxide or baking soda paste | Porous; may need repeat treatment |
| Silicone caulk | Hydrogen peroxide | Often needs replacement if deeply stained |
| Painted drywall/ceiling | Hydrogen peroxide (diluted) | Porous; may require repainting or replacement |
The step-by-step mold removal process
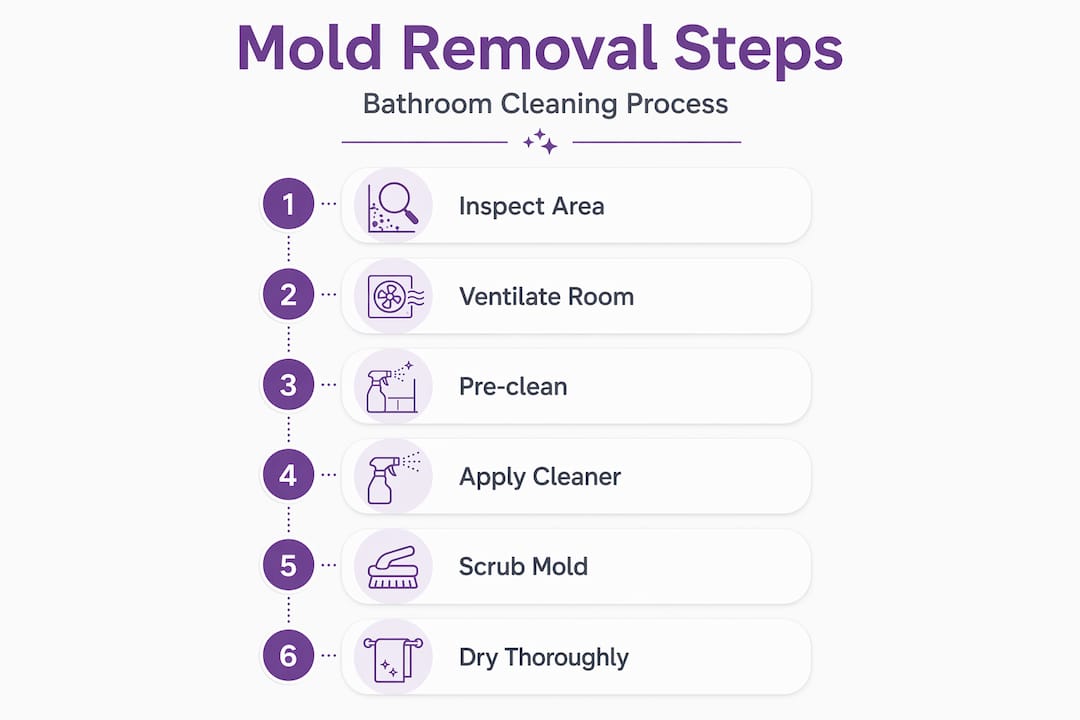
Now you’re ready to actually remove the mold. Work through these steps in order. Skipping ahead or rushing the dwell time is the most common reason mold comes right back.
-
Ventilate the space. Open the window, turn on the exhaust fan, and keep the bathroom door open if possible. Do this before you start anything else.
-
Put on your PPE. Gloves, goggles, and N95 respirator go on before you open any cleaning product.
-
Pre-clean with dish soap. Scrub all affected surfaces with dish soap and warm water. Rinse thoroughly and let the surface dry slightly. This removes the soap scum biofilm that blocks treatments from working.
-
Apply your cleaning solution. For tile and grout, spray undiluted white vinegar directly onto the mold. For stubborn grout, apply a paste of baking soda and a small amount of water, then spray vinegar on top. For deeper stains or porous surfaces, hydrogen peroxide oxidizes mold more effectively than bleach and won’t leave behind a bleach residue.
-
Let it dwell. This is the step most people rush. Cleaning solutions need 20 to 30 minutes of contact time to actually kill mold at the root level. Set a timer. Walk away. Come back when it’s done.
-
Scrub with the right tool. Use a stiff grout brush for grout lines and tile joints. Use an old toothbrush for tight corners and around fixtures. Scrub in small circular motions, applying steady pressure. Don’t scrub so hard that you damage the grout surface.
-
Rinse and wipe down. Use clean warm water to rinse the area thoroughly. Wipe dry with a microfiber cloth. Leaving surfaces wet after cleaning is an invitation for mold to return.
-
Inspect the caulk. If the silicone caulk around your tub or shower has mold that doesn’t respond to treatment, bleach and surface cleaners can’t penetrate porous caulk deeply enough to remove embedded mold roots. The right call is to remove the old caulk entirely with a caulk removal tool, clean the gap underneath, let it dry fully for 24 hours, and apply fresh silicone caulk.
-
Dry the bathroom completely. Run the exhaust fan for at least 20 minutes after you finish. Use a squeegee on the shower walls if you have one. The faster the bathroom dries, the less chance mold has to reestablish.
Pro Tip: Avoid mixing bleach with vinegar, ammonia, or hydrogen peroxide. Bleach requires ventilation and PPE even on its own. If you choose to use it on non-porous tile, never combine it with anything else in the same spray bottle or bucket.
A note on bleach: it works on glazed, non-porous tile surfaces but it’s water-based, which means it sits on top of porous materials rather than penetrating them. On grout and caulk, bleach may make the mold look gone while the roots stay intact underneath. Hydrogen peroxide is the better choice for those surfaces.
Troubleshooting persistent mold and hidden problems
Sometimes you do everything right and the mold comes back within weeks. That’s usually a sign the problem runs deeper than the surface you cleaned.
Signs the mold is more than skin deep
Watch for these warning signs that tell you surface cleaning won’t be enough:
- A musty smell that persists even after cleaning. Persistent musty odor often signals hidden mold behind walls or under flooring, where moisture has been sitting for a long time.
- Mold that keeps returning in the same spot within two to three weeks of cleaning.
- Soft, discolored, or bubbling drywall or ceiling paint near the mold.
- Mold appearing in multiple spots across the bathroom at once.
If you’re cleaning the same patch of mold every month, you’re treating a symptom, not the problem. The real issue is moisture, and until you fix the source, no cleaning product will give you a lasting result.
Treating the area around visible mold
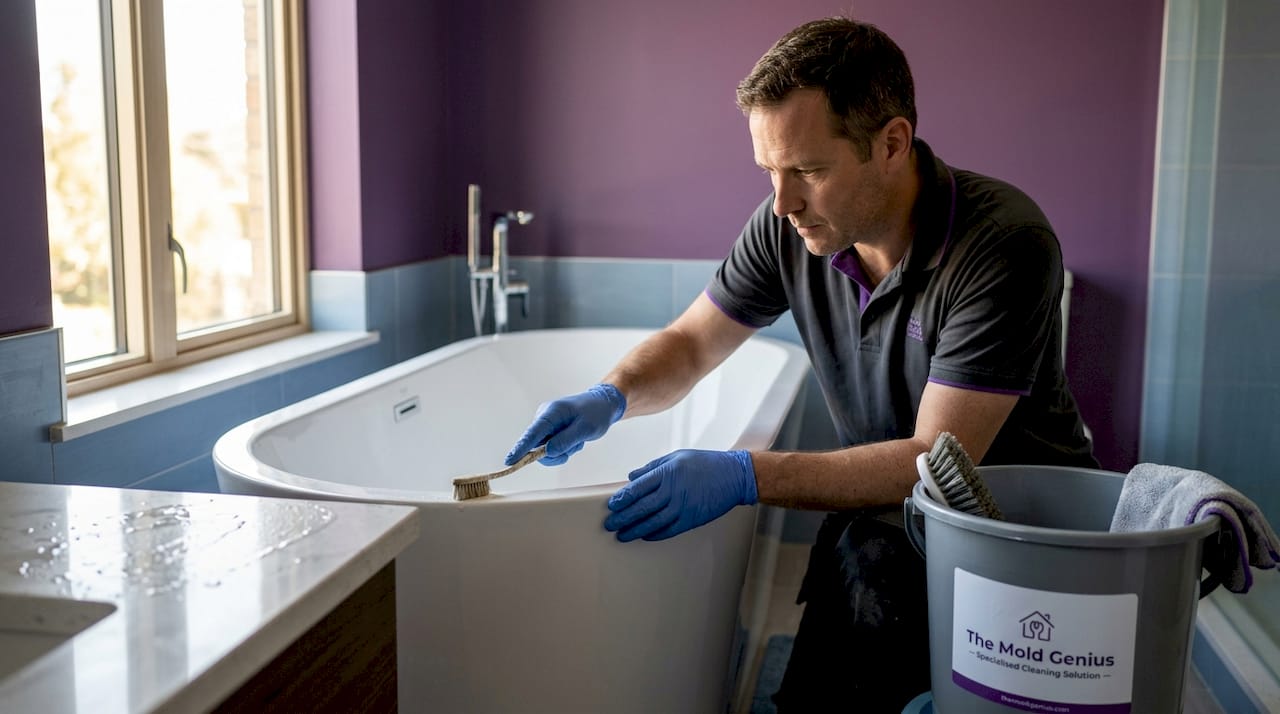
One of the most overlooked bathroom cleaning tips is this: mold extends 6 to 12 inches beyond what you can actually see. If you only clean the visible black patch, you’re leaving active mold growth right next to the area you just treated. Always clean a wider zone than you think you need to.
When to call a professional
Mold on drywall or ceiling paint is a different situation than mold on tile. Drywall is porous and absorbs moisture deeply. If you see mold on a painted bathroom ceiling or wall, cleaning the surface may not reach the mold that’s already grown into the material. In those cases, the drywall often needs to be cut out and replaced.
Pro Tip: Before you assume the mold is just surface-level, press gently on the drywall near the affected area. If it feels soft or spongy, water damage has already compromised the material and cleaning alone won’t fix it.
If you’re dealing with a large area, recurring mold despite repeated cleaning, or any signs of hidden moisture, that’s the point where professional inspection makes more sense than another round of scrubbing.
Preventing bathroom mold from coming back
Removing mold is only half the job. Keeping it gone is where most homeowners fall short. These steps are straightforward but they have to be consistent.
Moisture control is the foundation
Mold needs moisture to survive. Cut off the moisture and you cut off the mold. Run your exhaust fan during your shower and for 15 to 20 minutes after to pull humid air out of the room. If your fan sounds weak or old, it may not be moving enough air. A bathroom fan should be rated for the square footage of your bathroom.
Keep indoor humidity below 50%. A small hygrometer (available for under $15) tells you exactly what the humidity level is in your bathroom. If it’s consistently above 50%, a small dehumidifier or upgraded exhaust fan will make a real difference.
Routine maintenance that actually prevents mold
Here’s what a consistent prevention routine looks like:
- After every shower, use a squeegee on the walls and glass doors. This takes 30 seconds and removes the standing water that feeds mold.
- Hang wet towels and bath mats outside the bathroom to dry rather than leaving them on the floor.
- Seal grout every 12 to 24 months to prevent water from absorbing into the surface. Unsealed grout is essentially a sponge.
- Check under the sink and around the toilet base for slow leaks every few months. A dripping supply line or a failing wax ring can feed hidden mold for months before you notice it.
- Do a light cleaning of tile and grout weekly with a mild bathroom cleaner. Frequent light cleaning prevents buildup far more effectively than occasional deep scrubbing.
Pro Tip: After resealing grout, let it cure for the full time listed on the product label before using the shower again. Rushing this step means the sealer won’t bond properly and water will get in anyway.
My honest take after years of seeing this done wrong
I’ve seen hundreds of bathrooms where homeowners did everything they thought was right and still couldn’t get ahead of the mold. The pattern is almost always the same. They cleaned the visible mold, skipped the dwell time, and never addressed the moisture source. The mold was back within a month.
What I’ve learned is that patience with the process matters more than the product you choose. A 20-minute dwell time with plain hydrogen peroxide outperforms a 30-second scrub with the most expensive cleaner on the shelf. The chemistry needs time to work.
I’ve also seen people skip PPE because the mold patch looked small. Disturbing even a small colony releases spores. It’s not worth the exposure, especially for anyone with asthma or a compromised immune system.
The other thing I’d push back on is the instinct to reach for bleach first. I understand it. Bleach feels powerful. But on grout and caulk, bleach can’t penetrate porous materials deeply enough to kill the roots. You’re whitening the surface while leaving the mold alive underneath. Hydrogen peroxide is the better tool for those surfaces, and it’s safer to use in an enclosed space.
Finally, know when the job is bigger than a spray bottle. If mold keeps coming back, if you smell it but can’t find it, or if it’s growing on drywall, that’s a professional situation. Replacing drywall and treating behind walls requires containment and equipment that DIY methods can’t replicate.
— Jim
When DIY isn’t enough: professional mold removal

You’ve done the cleaning, replaced the caulk, and improved the ventilation. But if the mold keeps returning or you’re finding it in places you can’t reach, that’s when professional help changes the outcome. Themoldgenius offers bathroom mold remediation for Chicagoland homeowners who are past the point of DIY fixes. Their Pure Cloud Technology uses hospital-grade hydrogen peroxide in a dry fog that reaches behind walls, above ceilings, and into tight corners that brushes and sprays simply can’t access. If you suspect the problem goes deeper than the surface, or if you’ve been cleaning the same spot for months, their team can assess the full scope and treat it in a single day. They also handle water damage restoration when a leak is the root cause. Free estimates are available, and they work with most major insurance carriers. Get a full picture of their mold removal services before your next cleaning session turns into another temporary fix.
FAQ
How long does bathroom mold removal take?
A small to moderate DIY mold removal job typically takes two to three hours when you include prep, dwell time, scrubbing, and drying. Larger infestations or those involving drywall will take significantly longer and often require professional help.
Can I remove black mold in the bathroom myself?
You can remove black mold yourself if the affected area is 10 square feet or less. Anything larger, or mold that has penetrated drywall or spread behind surfaces, should be assessed and treated by a certified professional.
What is the best product for bathroom mold removal?
Hydrogen peroxide (3%) is one of the best mold removal products for bathroom surfaces because it works on both porous and non-porous materials and does not produce harmful fumes when used alone. Undiluted white vinegar is also effective for tile and grout.
Why does mold keep coming back after I clean it?
Mold returns because the moisture source hasn’t been fixed. Cleaning removes visible growth but if humidity stays high, ventilation is poor, or a slow leak continues, mold will regrow. Address the root cause alongside the cleaning for lasting results.
Do I need to replace caulk to get rid of mold?
Yes, in most cases. Silicone caulk is porous and mold roots grow into it at a depth that surface cleaners can’t reach. If scrubbing and hydrogen peroxide don’t clear the discoloration, removing and replacing the caulk is the only permanent solution.