Mold removal is defined as the physical and chemical process of eliminating mold colonies from surfaces, combined with moisture control to prevent regrowth. The EPA identifies moisture correction as the single most critical factor in any mold cleanup. Without fixing the water source first, no scrubbing, spraying, or fogging will deliver lasting results. This article breaks down the main mold removal methods compared checklist style, so you can evaluate each approach by effectiveness, safety, and practicality before you pick up a brush or call a professional.
1. What are the main mold removal methods homeowners can use?
Mold remediation methods fall into three broad categories: physical removal, chemical treatment, and material disposal. Each serves a different purpose depending on the surface type and the severity of the infestation.
Physical removal is the baseline method. You scrub mold from hard, non-porous surfaces using detergent and water, then dry completely. This approach works well on tile, glass, metal, and sealed concrete. The scrubbing action physically dislodges mold colonies, and thorough drying removes the moisture mold needs to survive.
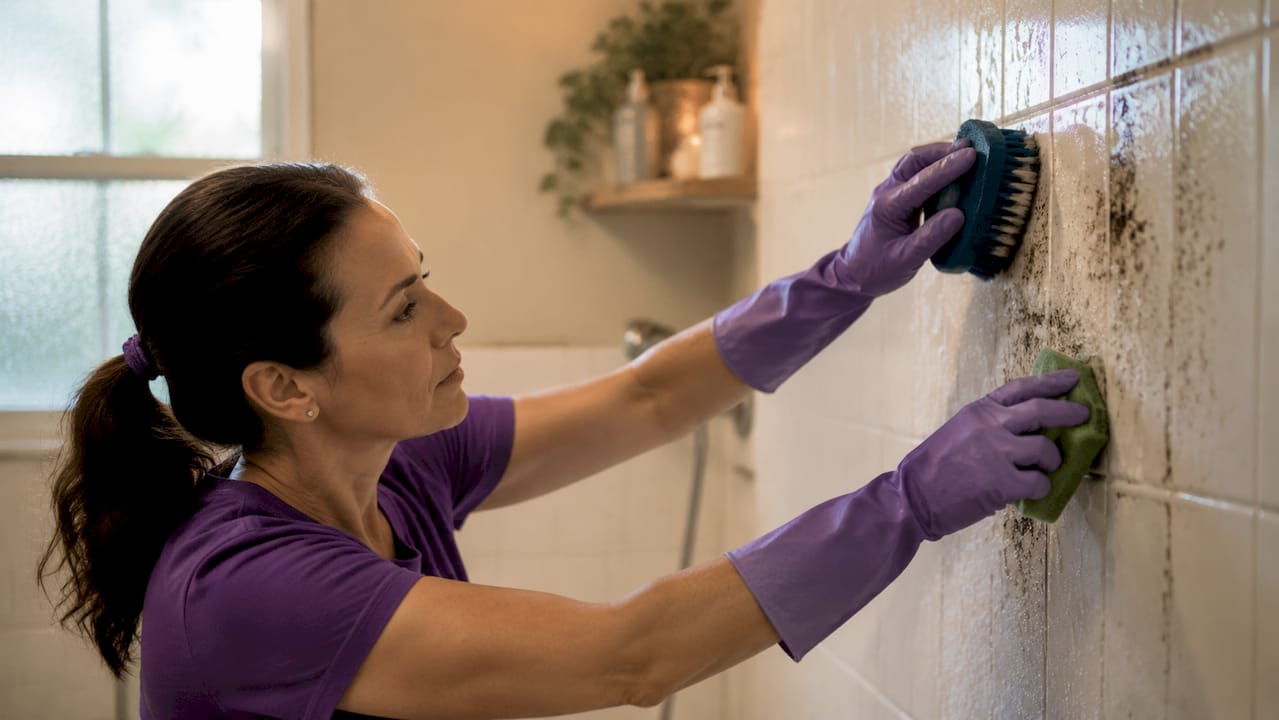
EPA-registered antimicrobials are the preferred chemical treatment for hard surfaces after physical removal. These products are formulated to kill residual mold spores without the drawbacks of bleach. The EPA recommends EPA-registered antimicrobials rather than biocides for most mold cleaning because bleach does not penetrate porous materials and can leave behind moisture that feeds further growth. Antimicrobial products also vary in dwell time requirements. Wiping them off immediately wastes their efficacy, so always follow label instructions.
Material disposal is the correct approach for porous materials like drywall, carpet, ceiling tiles, and insulation. Mold penetrates deep into the fibers and cavities of these materials, making surface cleaning ineffective. Porous materials often must be discarded because cleaning cannot remove mold fully from crevices. This is why drywall and insulation removal are standard steps in professional remediation projects.
Moisture control techniques include running dehumidifiers, directing fans at wet areas, and monitoring indoor humidity with a hygrometer. The EPA recommends keeping indoor humidity below 60% and drying wet materials within 24 to 48 hours. This benchmark matters because mold can establish new colonies within that window if surfaces stay damp.
Pro Tip: Never paint over a moldy surface before cleaning it. Paint traps moisture underneath and accelerates mold growth rather than stopping it.
2. How different mold removal methods compare on effectiveness, safety, and practicality
Not all mold removal techniques deliver the same results. Here is a direct comparison across the factors that matter most to homeowners.
| Method | Effectiveness | Safety concern | Best for |
|---|---|---|---|
| Scrubbing with detergent | High on non-porous surfaces | Low with gloves and mask | Tile, sealed concrete, metal |
| EPA-registered antimicrobials | High when dwell time is followed | Moderate, ventilation required | Hard surfaces post-scrub |
| Bleach solution | Low on porous surfaces | High, fumes and moisture risk | Not recommended by EPA |
| Material disposal | Highest for porous items | Moderate, containment needed | Drywall, carpet, insulation |
| Dry fogging (hydrogen peroxide) | High, reaches hidden areas | Low, non-toxic formulas available | Whole-room or behind-wall treatment |
| Dehumidification and drying | Preventive, not curative | None | Post-cleanup moisture control |
Physical scrubbing beats chemical-only approaches on non-porous surfaces because it removes the physical mass of the colony rather than just killing surface spores. Chemical treatments work best as a follow-up step, not a standalone fix.
Bleach is the most common DIY choice, but it is also the most misunderstood. The EPA no longer recommends bleach for porous surfaces because it does not penetrate and can feed mold by leaving moisture behind. Many homeowners spray bleach on drywall, see the surface lighten, and assume the mold is gone. The mold is still active below the surface.
Containment and HEPA filtration are safety requirements, not optional upgrades. HEPA filtration and containment reduce mold spore dispersion during removal and protect everyone in the home. Disturbing mold without containment sends spores airborne and spreads the problem to rooms that were previously clean.
For DIY practicality, scrubbing with detergent and EPA-registered antimicrobials is the most accessible approach for small, hard-surface mold patches. Anything involving porous material removal or large infestations requires professional equipment and protocols.
3. Your mold cleaning checklist: step-by-step from assessment to prevention
A thorough mold cleaning checklist covers six phases. Skipping any phase, especially moisture control, produces incomplete results.
Phase 1: Identify and assess
- Locate all visible mold and note the surface type (porous vs. non-porous).
- Check for hidden moisture sources: leaking pipes, roof intrusion, condensation on walls.
- Measure the total affected area. Patches under 10 square feet are generally DIY-eligible.
- Use a full home mold assessment approach if you suspect mold behind walls or above ceilings.
Phase 2: Gear up with proper PPE
- Wear an N-95 respirator or better. A dust mask does not filter mold spores.
- Put on nitrile gloves and safety goggles.
- Wear old clothing you can wash immediately or disposable coveralls.
Phase 3: Contain the area
- Seal off the work area with plastic sheeting and tape over doorways and vents.
- Open a window for ventilation, but direct airflow away from the rest of the house.
- Avoid air dispersion during cleanup by wetting surfaces before scrubbing to suppress dust.
Phase 4: Remove the mold
- Scrub non-porous surfaces with detergent and water using a stiff brush.
- Apply an EPA-registered antimicrobial and allow the full dwell time listed on the label.
- Bag and seal porous materials like carpet, drywall, or ceiling tiles for disposal.
Phase 5: Clean and disinfect
- Wipe down all treated surfaces with a clean damp cloth.
- Apply a second round of antimicrobial if the infestation was heavy.
- Do not use bleach on drywall, wood, or any porous surface.
Phase 6: Dry and monitor
- Run fans and a dehumidifier immediately after cleaning.
- Dry moldy areas within 24 to 48 hours to prevent regrowth. This is the most skipped step in DIY cleanup.
- Monitor indoor humidity weekly for at least one month post-cleanup.
Pro Tip: Buy a digital hygrometer for under $15 at any hardware store. Keeping indoor humidity below 50% is the single most effective long-term mold prevention tool available to homeowners.
4. When to call a professional vs. handle it yourself
The EPA sets 10 square feet as the threshold for professional remediation. That is roughly a 3-by-3-foot patch. Anything larger carries risks that DIY methods cannot reliably manage.
Call a professional when any of these conditions apply:
- The mold covers more than 10 square feet of surface area.
- You find mold inside HVAC ducts or air handling units. Mold in air duct systems requires specialized equipment to avoid spreading spores through the entire home.
- The mold appears black and slimy, which may indicate Stachybotrys chartarum (commonly called black mold), a species that requires professional containment protocols.
- Mold has penetrated structural materials like wall framing, floor joists, or roof sheathing.
- Anyone in the household has asthma, allergies, or a compromised immune system.
- You have already attempted DIY cleanup and the mold returned within weeks.
DIY is reasonable when the patch is small, the surface is non-porous, the moisture source is identified and fixed, and you have proper PPE. A bathroom tile grout line with surface mold is a legitimate DIY job. A basement wall with mold spreading behind the drywall is not.
Inadequate containment during DIY removal is the most common mistake that turns a small problem into a whole-house issue. Cleanup procedures should minimize disturbing mold to avoid spreading spores in the air. If you cannot seal off the work area properly, the risk of cross-contamination is real. Review the questions you should ask before hiring a mold removal company to make sure you choose the right professional for the job.
Key takeaways
Effective mold removal requires moisture control, physical removal, proper PPE, and material disposal decisions based on surface type, not just surface cleaning alone.
| Point | Details |
|---|---|
| Moisture control comes first | Fix the water source before any cleaning or the mold will return within weeks. |
| Bleach is not the answer | EPA recommends EPA-registered antimicrobials; bleach leaves moisture on porous surfaces and feeds regrowth. |
| Porous materials need disposal | Drywall, carpet, and insulation cannot be cleaned effectively and must be removed. |
| Dry within 24 to 48 hours | Fans and dehumidifiers after cleanup are non-negotiable to stop new colonies from forming. |
| 10 square feet is the DIY limit | Anything larger, or involving HVAC or structural materials, requires professional remediation. |
What 25 years of mold jobs taught me about the checklist most homeowners skip
After working on hundreds of mold jobs across Chicagoland, the pattern I see most often is not that homeowners use the wrong cleaning product. It is that they skip the drying phase entirely. They scrub, they spray, they feel like the job is done. Then they call us back six weeks later because the mold is back and worse.
The 24 to 48 hour drying window is not a suggestion. Mold spores are always present in indoor air. Give them a damp surface and they will colonize it. A dehumidifier running for two days after cleanup is the difference between a one-time fix and a recurring problem.
The other thing I push back on constantly is the bleach myth. I understand why homeowners reach for it. It is cheap, it is familiar, and it makes the surface look clean immediately. But on drywall or wood framing, bleach does not penetrate. The water in the bleach solution soaks into the material and creates the exact moisture condition mold needs. You are making the problem worse while thinking you are solving it.
PPE is the third area where I see people cut corners. Mold spores released during scrubbing are invisible. You will not feel them entering your lungs in the moment. The effects show up later as respiratory irritation, headaches, or worsened allergy symptoms. An N-95 respirator costs less than $5 per mask. There is no good reason to skip it.
The checklist in this article reflects what actually works based on EPA guidance and real-world remediation experience. Follow every phase, not just the visible cleaning steps, and you will get a result that holds.
— Jim
How Themoldgenius handles what DIY methods can’t reach
If your mold problem goes beyond a small surface patch, Themoldgenius brings a different level of capability to the job. Their mold removal and remediation process follows a three-phase approach: thermal imaging and moisture detection to find hidden mold, Pure Cloud Technology dry fogging to treat areas behind walls and above insulation, and root-cause correction to prevent recurrence.

Themoldgenius serves homeowners across Chicagoland with specialized services for basement mold removal, attic mold, crawlspace mold, and bathroom mold. Most jobs wrap up in a single day with no gutting of rooms. They work with major insurers including Allstate, State Farm, USAA, and Farmers, and offer free estimates. If you have already run through the checklist and the mold keeps coming back, that is the job Themoldgenius was built for.
FAQ
What is the most effective mold removal method for homeowners?
Physical scrubbing with detergent and water followed by an EPA-registered antimicrobial is the most effective approach for non-porous surfaces. Porous materials like drywall and carpet must be removed and discarded rather than cleaned.
Does bleach kill mold on walls?
Bleach is not recommended by the EPA for porous surfaces like drywall or wood because it does not penetrate and leaves behind moisture that can feed further mold growth. Use an EPA-registered antimicrobial instead.
How do I know if my mold problem needs a professional?
The EPA recommends professional remediation for mold areas larger than 10 square feet, or any situation involving HVAC systems, structural materials, or toxic mold species. You can also review a home air quality checklist to assess severity before deciding.
How long does mold take to grow back after cleaning?
Mold can begin regrowing within 24 to 48 hours if moisture is not fully eliminated after cleanup. Running fans and a dehumidifier immediately after cleaning and keeping indoor humidity below 60% are the two most effective ways to prevent rapid regrowth.
What PPE do I need for DIY mold removal?
At minimum, wear an N-95 respirator, nitrile gloves, and safety goggles. For larger patches or enclosed spaces, add disposable coveralls to prevent spores from transferring to other areas of your home on your clothing.